
How-to guides
Publish and Share Your Calendar
Give families one place to check your schedule. Publish a read-only view, test the link, and republish when arrangements change.

Do edits automatically update the shared calendar?
No. Editing the original calendar does not change the published view. Use Republish to update the same read-only link, then ask viewers to reopen or refresh it. Tell families separately about important changes; republishing does not send notifications.
Swipe across the diagram, or read the steps below.
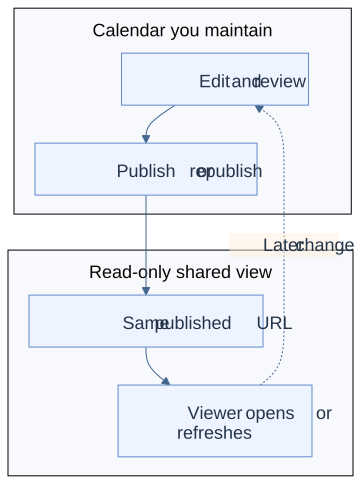
Read the workflow steps
- Edit and review the original calendar. Editing alone does not update the published view.
- Publish the first version or republish later changes.
- Viewers open or refresh the same URL. For another change, return to the original and repeat.
1. Review the calendar
Open the calendar you want to share. Check its title, description, event dates, times, and details so viewers have the information they need.
2. Publish the read-only view
Select Publish calendar and review the information that viewers will see. If you want viewers to enter a password, fill in Optional password before selecting Publish.
The published view is read-only. Viewers can check the schedule without changing the calendar you maintain.
3. Test and share the link
Copy the published URL and open it in another browser or on your phone. Check the schedule and, if you set a password, confirm that the password prompt appears and the password opens the view.
Share the URL through your usual family, classroom, or club communication channel. Provide the password to the intended viewers if you set one.
4. Republish changes
Edit the original calendar when a date, time, or event detail changes. Check the updated plan, open Publish calendar, and select Republish.
The published URL stays the same. Viewers can reopen or refresh it to see the updated schedule. Republishing does not send an automatic notification, so communicate important changes through your usual channel.
Make the next week easier to see
Start with a few activities, check the details, and build from there.
Publish your calendarNext guide: Move Your Calendar Events with One Chat Request